Camps 21 and 18
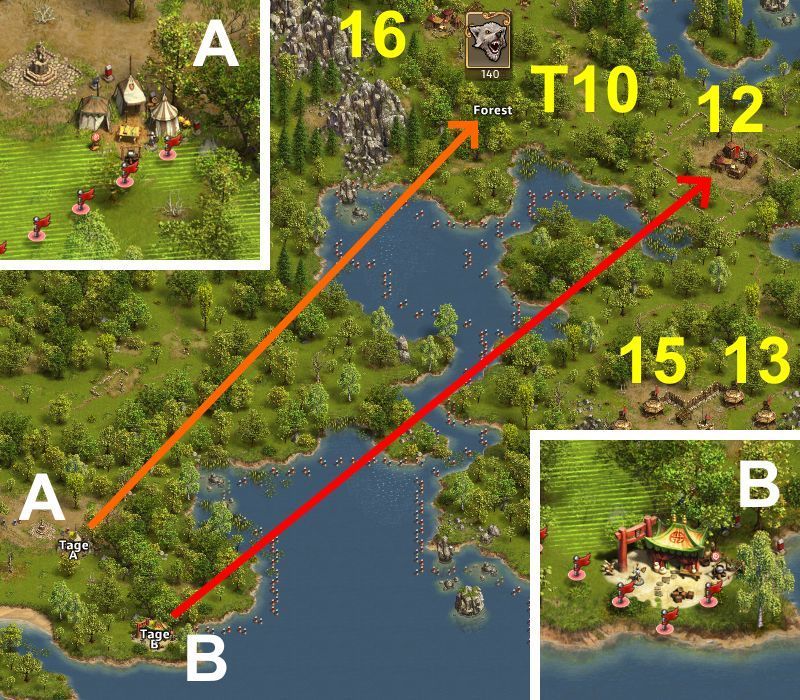
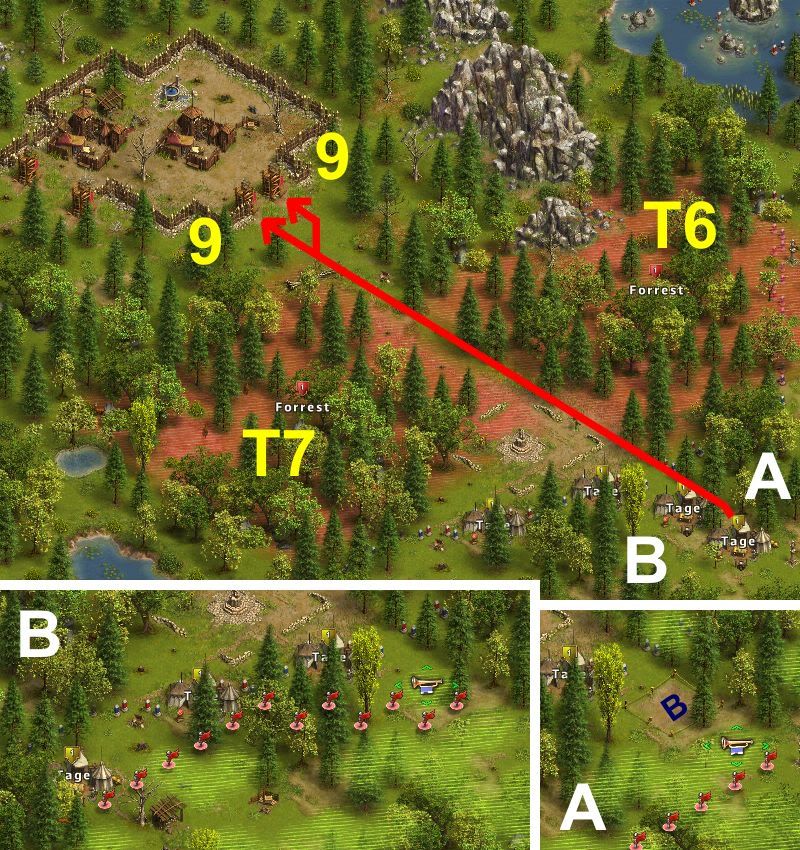
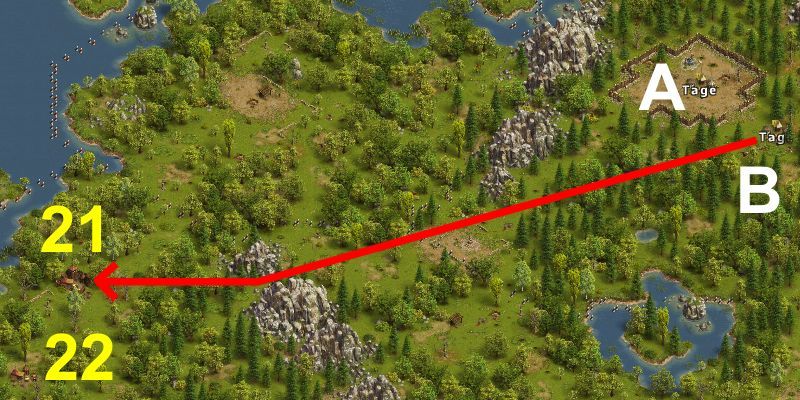
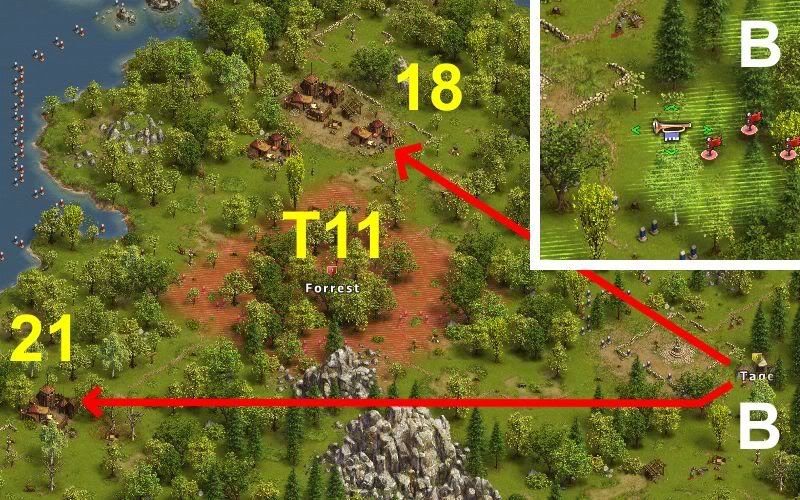 From B to Camp 21)
 85 Recruit Deserters, 65 Bowman Deserters
ANY general:
[40R 129C 31LB (30R - 35R - 40R)]
ANY general:
[39R 1S 129C 31LB (30R - 35R - 39R)]
ANY general:
[37R 1S 139C 23XB (29R - 33R - 37R)]
Lord DRACUL:
[37R 1S 162C (24R - 28R - 37R)]
VETERAN general:
[27R 1S 222C (21R - 25R - 27R)]
MASTER of Martial Arts:
[25R 1S 194C (19R - 22R - 25R)]
From B to Camp 18) 20 Militia Deserters, 60 Longbowman Deserters
ANY general:
[4R 196C (0R - 2R - 4R)]
ANY general:
[2R 1S 197C (0R - 1R - 2R)]
Lord DRACUL:
[1S 199C (-)]
VETERAN general:
[1S 230C (-)]
MASTER of Martial Arts:
[175C (-)]
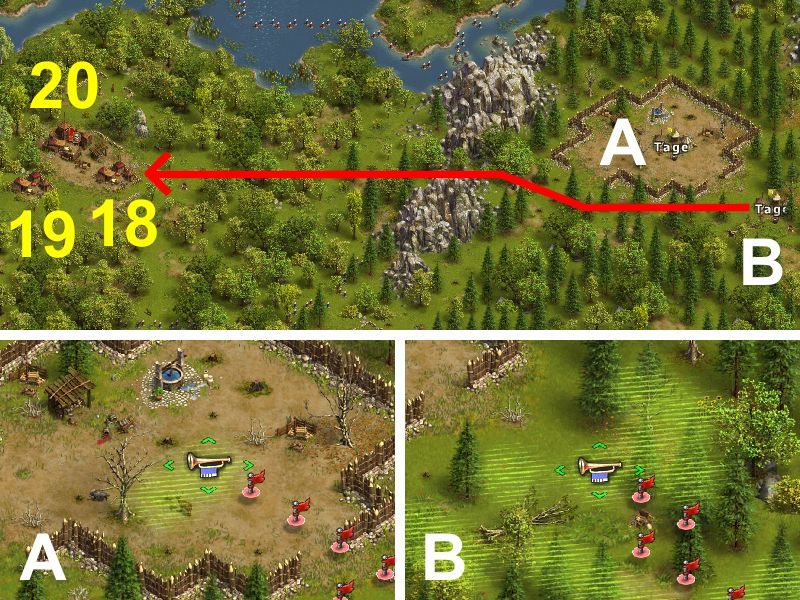
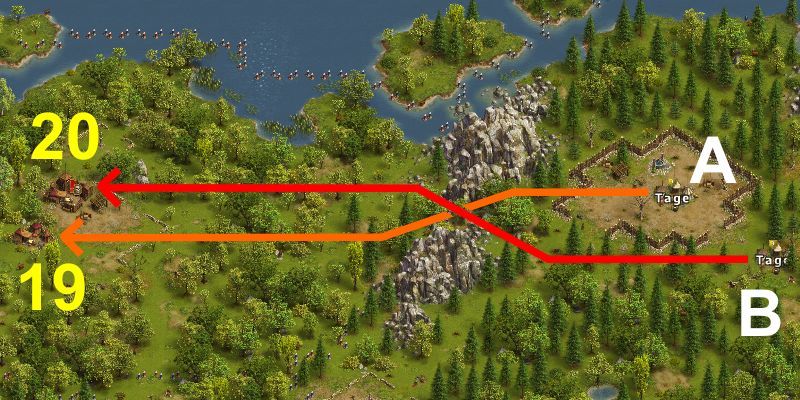
Camps 19 and 20 (BLOCK)
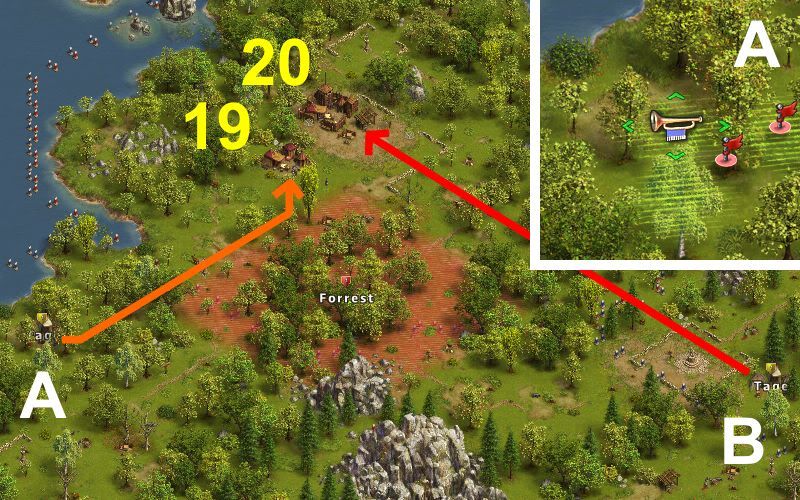
Send both generals after each other:
From A to Camp 19) 40 Militia Deserters, 40 Longbowman Deserters
BLOCKING NORMAL general:
[104C (-)] {
120 - 220 seconds of fighting}
From B to Camp 20) 40 Militia Deserters, 40 Longbowman Deserters, 1 Sir Robin
ANY general:
[95R 2M 80K (61R - 83R - 95R 2M)] {30 seconds of fighting}
Lord DRACUL:
[136R 64S (66R - 106R - 136R)] {40 - 70 seconds of fighting}
Lord DRACUL:
[123R 1S 76E (62R - 106R - 123R)] {40 - 60 seconds of fighting}
Lord DRACUL:
[93R 2M 80K (59R - 80R - 93R 1M)] {30 seconds of fighting}
VETERAN general:
[110R 140S (68R - 96R - 110R)] {50 seconds of fighting}
VETERAN general:
[80R 4M 166K (53R - 70R - 80R 4M)] {20 seconds of fighting}
MASTER of Martial Arts:
[77R 143S (39R - 67R - 77R 1S)] {40 seconds of fighting}
MASTER of Martial Arts:
[48R 1E 140K (27R - 41R - 48R)] {20 seconds of fighting}
And if you don't have a veteran, Lord Dracul or cannoneers, kill the camps one at a time:
From A or B to Camp 19) 40 Militia Deserters, 40 Longbowman Deserters
ANY general:
[21R 179C (11R - 15R - 21R)]
ANY general:
[18R 1S 181C (11R - 15R - 18R)]
From A or B to Camp 20) 40 Militia Deserters, 40 Longbowman Deserters, 1 Sir Robin
ANY general:
[200R (74R - 126R - 172R)]
ANY general:
[138R 62S (74R - 111R - 138R 1S)][/B]


Originally Posted by Lisztes

 Reply With Quote


 Back to Map